There are two ways to Edit the existing invoice.
Either right after generating an Invoice
Once, the Invoice is created, the next window : Dashboard → Invoices → Edit shows the created Invoice with options to Edit all the segments, like the screenshot below:
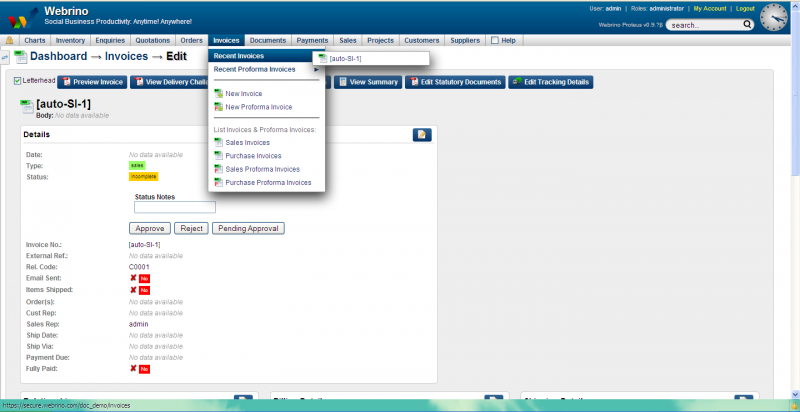
1. Alternatively, Mouse-Over to Invoice Menu
2. On drop down, select Recent Invoices and on right hand pop-up, select the name of the Invoice which needs Editing
Note: only Pending Invoices can be edited.
3. The window shown above opens up
4. There are a few buttons at the top of this window
5. Clicking on Add Items button will take you to the middle of this window where you can Add details either from the existing SKU or a Custom details
6. If you choose SKU, you have an option of choosing whether this Invoice is for Rental instead of Selling
7. If you choose Rent, you would be required to enter the duration of the Rental.

8. Custom lets you add your own details to the Invoice. Choose Custom and the window changes like the one below:

9. Enter the Name of this custom detail, Description, Comments
10. Add the Unit Price, Qty, Units, Discount (if any), Shipping and Tax Category.
11. Choose Excise, if there would an Excise duty levied
12. Add other required details and click Add to add this item on to the Invoice
13. You can add as many items as you wish to your Invoice